We’re moving!

Hi everyone,

As you know if you’ve followed this blog for a while, I started this site as a way to share recipes with family and friends – and a lot of new friends have joined along the way, which is fantastic! It has always been my intention that this blog is an online cookbook, a working, useful tool. At first the ads on the free version of WordPress were not too cumbersome – but things have escalated to the point where it’s not even fun to use this blog anymore.

So – this week we’re moving! I spent part of this week building a new home for this blog. The new address will be www.leelanaucooking.com. I’m hoping to have the first post up tomorrow (don’t visit right now, it’s not quite ready). I expect that this will be a seamless process for everyone, but if it’s not please resubscribe at the new site over the weekend.

I will leave this site up but please know that all future updates will happen on the new site.

Happy Friday!

Baked Custard

baked custard

by Heather Harris-Brady

It’s been about 15 months and what feels like a lifetime since I last posted. There have been a few very bright spots and too many funerals along the way, but something is calling me to reach out. Food has been a great source of comfort and healing for me. Now, in these challenging times, it’s the small thing I have to offer. So I am committing to posting every day for at least the next three weeks. The recipes will be simple comfort food, these recipes may not all be new but I am flipping through the recipe box and picking out things especially for you! You can find them all posted under the new “Comfort Food” category.

This baked custard was one of my grandma’s standbys for lean times, when there wasn’t a lot in the kitchen, and times when a patient needed to be nursed back to health. It’s very flexible, you can have it warm or cold, with berries or cookies on the side or plain, and it’s at home anytime – dessert, breakfast, or brunch. It easily doubles or halves, and it’s so simple it’s the perfect starter recipe to get kids interested in cooking.

If you change the milk type just know that anything less than whole milk will make your custard a bit watery when it cools down. It will still taste fantastic.

Baked Custard, Basic Method

For each 1-1/2 c. of milk (whole milk is best, but you can use 2%, evaporated, or half and half):

  • 1 egg (you can add a second egg if you’d like a firmer texture)
  • 1-1/2 t. sugar (white granulated sugar, brown sugar, or maple sugar can all be used)
  • 1/2 t. vanilla
  • Dash of cinnamon

Preheat the oven to 350. Find a baking dish that will hold all your ramekins comfortably. Set them the dish and add warm water until it reaches halfway up the side of the ramekins. Take the ramekins out and put the dish with the water in the oven to heat while you mix up the custard.

Combine all the ingredients in a bowl except the cinnamon. Whisk until well-combined. Pour into lightly greased ramekins and sprinkle the top with cinnamon.

DSCN5346

Bake for about 35-40 minutes, or until the edges are firm but the center still jiggles slightly. Sometimes it will puff a little in the center and then fall when you take it out to cool.

baked custard little house by the dunes

You can eat them warm or cool. If you’re making the custard ahead of time, let the ramekins cool down a bit. Cover them with plastic wrap and put them in the refrigerator until thoroughly chilled.

baked custard

Either way, I suggest wrapping up in a blanket somewhere warm and savor each creamy bite. It’s always been one of my favorite dishes. It’s what I cooked for my mom last Easter, when she was in the latter stages of brain cancer and couldn’t always communicate what she wanted or needed, and had little appetite. I had to guess, and she ate every bite. On that note, I hope you have some treasured memories of things someone you love cooked for you that you. Until tomorrow!

PS: If this speaks to you please share this post 🙂

Leelanau Cherry Cinnamon Coffeecake

leelanaukugelhopf_8_little-house-dunes

by Heather Harris Brady

We are famous in these parts for cherries – tart cherries in particular. Because I like dried tart cherries WAY better than raisins, I decided to come up with a way to showcase them in a different style. This is based on a kugelhopf, a yeast-based cake often baked in a bundt or taller mold.

I was after a version that would come together quickly, and could be on the table for a Sunday brunch. It has dried tart cherries throughout, and a lovely crunchy cinnamon sugar top. It is not super-sweet, although you could always drizzle it with a powdered sugar glaze if you wanted.

Leelanau Cherry Cinnamon Coffeecake, Makes one 9″ cake

  • 1/3 c. dried tart cherries
  • 2 T. orange juice
  • 1/4 c. granulated sugar
  • 1 pkg. quick-rise yeast
  • 3/4 c. lukewarm whole milk
  • 2 c. all-purpose flour
  • 1/2 t. salt
  • 5 T. butter, at room temperature
  • 2 t. almond extract

Topping

  • 1 egg yolk
  • 1 T. cream
  • 1/2 c. greek yogurt
  • 1/4 c. granulated sugar
  • 1 t. ground cinnamon
  • 2 T. cold butter
  • Mix and set aside: 2 t. ground cinnamon + 1/4 c. granulated sugar

Make the dough:

Combine the cherries and orange juice, set aside. Measure the flour, yeast, sugar, and salt into a mixing bowl. Put on the dough hook.

leelanaukugelhopf_1_little-house-dunes

Stir until combined, add the milk and almond extract. Mix to a soft dough. When all the ingredients are combined, turn the speed to medium and beat for five minutes. Add the butter one tablespoon at a time and beat for three minutes.

leelanaukugelhopf_2_little-house-dunes

Drain the orange juice from the cherries, and knead them into the dough by hand. Pat the dough into a 9″ pie plate, preheat the oven to 375, and set the dough aside to raise for 30 minutes.

leelanaukugelhopf_3_little-house-dunes

Stir topping ingredients together, except for the cinnamon-sugar mixture.

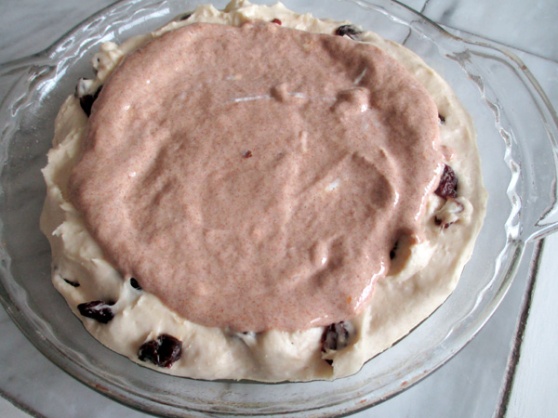
leelanaukugelhopf_4_little-house-dunes

Spread the topping over the raised dough.

leelanaukugelhopf_5_little-house-dunes

Then cover it evenly with the cinnamon-sugar mixture, dot with butter.

leelanaukugelhopf_6_little-house-dunes

Bake for 25-30 minutes.

leelanaukugelhopf_7_little-house-dunes

Serve warm or at room temperature. I like to warm any leftovers a few seconds in the microwave before serving.


Other Little House on the Dunes fall favorites –

2012: Thanksgiving Cookalong – The Menu & The Plan
2013: Soft Pumpkin Cookies
2014: Chocolate Sheet Cake
2015: Orange Cinnamon Breakfast Rolls
2016: Cinnamon Danish
2017: Dulce de Leche Truffle Pie


Honey Whole Wheat Bread

wholewheatbread_9_little-house-dunes

by Heather Harris Brady

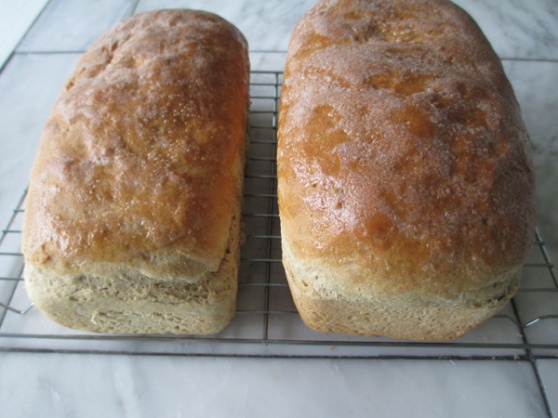
There are lots of bread recipes out there, and lots of them are good but few of them meet my main criteria – happily, this one does! If I’m making bread for everyday use I want two nice, full loaves that taste great, slice neatly, keep well, and are at least partly whole grain.

This recipe is based on a recipe in Farm Journal’s County Fair Award-Winning Recipes cookbook. I’ve tinkered with it to good effect – I changed the original ingredients a bit and simplified the mixing method. The sugar gives it a nice brown crust, which you can leave as-is or brush with melted butter if you like a softer outer crust.

Honey Whole Wheat Bread, Makes two 8″ x 4″ loaves

  • 1 pkg. quick-rise active dry yeast
  • 1-1/2 c. lukewarm water
  • 3-1/2 c. whole wheat flour
  • 2 T. local honey
  • 2 t. salt
  • 1/2 c. hot water
  • 1/3 c. brown sugar, lightly packed
  • 3 T. butter
  • 2 c. unbleached all-purpose flour
  • Melted butter for brushing

Combine the whole wheat flour, lukewarm water, yeast, and honey in a mixing bowl. Stir to a shaggy dough and rest for 15 minutes.

wholewheatbread_1_little-house-dunes

Combine the hot water, brown sugar, salt, and butter. Add to the bowl along with the all-purpose flour.

wholewheatbread_2_little-house-dunes

Stir until the ingredients are well-incorporated.

wholewheatbread_3_little-house-dunes

Let rise until doubled in bulk. Punch down and knead for five minutes on a lightly floured surface. Divide the dough in half. Pat each half to a disk, roll up like a jellyroll and put into greased loaf pans.

wholewheatbread_4_little-house-dunes

Let rise until the dough has reached the top of the pans. Preheat the oven to 375.

wholewheatbread_5_little-house-dunes

Bake for 35-40 minutes, or until the loaves sound hollow when you thump the top lightly.

wholewheatbread_6_little-house-dunes

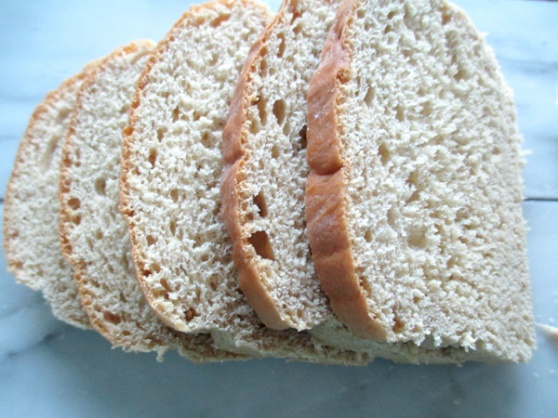
Set the pans on a rack and brush the tops of the loaves with melted butter if desired. After five minutes turn the loaves out of the pans to cool completely.

wholewheatbread_8_little-house-dunes

wholewheatbread_7_little-house-dunes

Your house will smell terrific and you will have amazing fresh sandwich bread for a week. These loaves freeze well, just make sure to double wrap them (once in plastic wrap and then with an outer covering of freezer paper).


Other Little House on the Dunes fall favorites –

2012: Apple Crisp
2013: Malakoff Torte
2014: Brioche Coffeecake
2015: Panna Cotta with Pears & Salted Caramel
2016: Gingergold Cake
2017: Marble Bars


Mocha Torte

choctorte_8_little-house-dunes

by Heather Harris Brady

This is a variation of what is purported to be Queen Elizabeth’s favorite tea cake. It’s a very easy and quick dessert to make. Just throw it together a day or two before, and then dress it up or down as needed. This is a fantastic choice for guests who aren’t into super-sweet, sugary desserts. The key ingredient is McVitie’s Wheat Biscuits, which my major grocery shelves in the International aisle:

choctorte_2_little-house-dunes

I know, wheat cookies – weird. But if you are anything like me you will quickly acquire a taste for them – especially in combination with chocolate!

Mocha Torte, Makes one 5″ x 8″ torte (Approx. 8 slices)

  • 1 8-oz package of high-quality chocolate chips (I use Ghirardelli 60%)
  • 1 c. heavy whipping cream
  • 2 T. butter
  • 1 t. vanilla
  • 1 8 oz. package McVitie’s Wheat Biscuits
  • 1 c. of coffee with extra cream (use your favorite coffee here)
  • 1 pint of fresh berries

Pour the heavy cream into a saucepan and put it on medium heat. Add the chocolate chips and butter.

choctorte_1_little-house-dunes

Add the butter and vanilla. Whisk until smooth.

choctorte_4_little-house-dunes

Set the chocolate mixture aside to cool to room temperature. Line a loaf pan with two layers of aluminum foil, leaving an overhang, and set that aside. Make up the cup of coffee and break the McVitie’s into pieces about the size of a quarter.

choctorte_3_little-house-dunes

Now spread a thin layer of chocolate over the bottom of the foil-lined pan. Cover that with 1/3 of the crumbled cookies, and spoon the creamy coffee over the cookies. I drizzle rather than drench, but how much coffee you add is up to you! Continue until you’ve used up the cookies, ending with a layer of chocolate on top. (I’m sorry I didn’t get pictures of the layering, I got carried away #badblogger.)

choctorte_6_little-house-dunes

Put the cake into the refrigerator until set. When the top is set you can cover it lightly. Take the cake out of the fridge about an hour before you’re ready to serve it. Lift up on the top of the foil, pull the cake up out of the pan, and peel off the foil.

choctorte_7_little-house-dunes

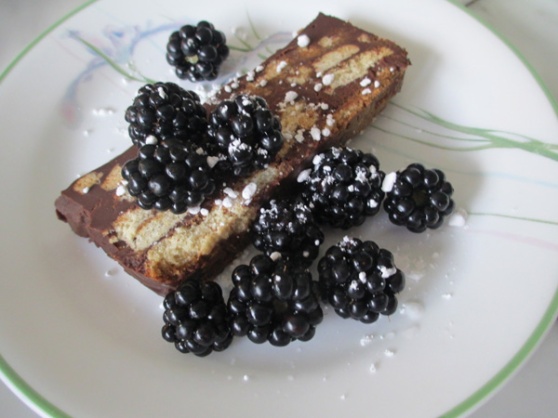
Cut the cake into 1″ slices and serve with fresh berries.

choctorte_8_little-house-dunes


Other Little House on the Dunes fall favorites –

2012: Farmhouse Cornbread
2013: Cheese Fondue
2014: Brioche Coffeecake
2015: Apple Dumplings
2016: Pumpkin Cake – Stir and Bake


Lizzie Bars (Gluten Free Granola Bars)

by Heather Harris Brady

I created these bars for one of my daughter’s friends, who is very active in sports but has to follow a restricted diet. I wanted to come up with an additive free, low-sugar protein bar that still tasted great – like a cookie. Happily these bars seem to have succeeded, as I have been making a batch a week for a few months now!

This recipe is made to be flexible, switch out the nuts for any kind of nut or seed, change the peanut butter to almond butter, whatever suits your granola fancy :).

  • 1/3 c. honey (preferably local)
  • 4 T. olive oil
  • 1/2 c. oat flour
  • 1-1/2 c. rolled oats
  • One egg
  • 1/2 c. natural peanut butter
  • 1/2 c. sugar-free dessicated fine coconut
  • 1 t. vanilla
  • 1/2 t. cinnamon (optional)
  • 1 c. peanuts
  • 1 c. dark chocolate chips

Preheat the oven to 375. Heat the honey and olive oil on medium to the boiling point. Take it off the heat.

Stir in the coconut, oats, and oat flour.

Along with the egg and flavoring.

When the mixture has cooled slightly, fold in the peanut butter, peanuts, and chocolate chips.

Pat the mixture onto a greased cookie sheet into a rough square about 1″ thick. Bake for 15-20 minutes, until the top starts to brown. Cut into 1-1/2″ x 2″ bars while warm. They will crisp up as they cool.

I wrap these individually in plastic wrap so they can survive a day in a school lunch box. They are great for pre-practice snacks or long car trips!


Quick Ramen Bowl

by Heather Harris Brady

Happy Thanksgiving week everyone! This is my favorite holiday of the year because it involves nothing more than cooking and eating – what could be better? If you’re looking for Thanksgiving recipes, check out my previous cook-along post. Otherwise, we’re going to jump into a new recipe today.

As much as I love the holiday, after it’s over I usually crave something really spicy. This quick ramen bowl fits the bill nicely.  I’m not going to pretend it’s traditional, instead think of it as homecooked fast food. (Click here if you want to try more traditional ramen.)

You do need good broth for this, so if you plan ahead you can make a lovely broth from Thursday’s leftover turkey trimmings (or vegetables). I’ve used turkey, chard, carrots here, but you can use any protein or vegetable combo that suits your fancy. It’s a very flexible recipe, and especially great if you need to fight off a cold.

Quick Ramen Bowls, Makes two large servings

  • 5 c. broth (any kind, I’m using chicken broth)
  • ¾ c. carrots, sliced in very thin coins
  • 2 c. swiss chard, cut in ribbons
  • ½ c. protein (I’m using ground turkey, but you could use tofu or already cooked meat)
  • 1 pkg. ready-to-use udon noodles
  • 1 t. minced garlic
  • 1 t. fresh ground gingerroot
  • Garlic-chili paste to taste
  • Two soft-yolk boiled eggs, peeled

Put the broth in a saucepan over high heat and reduce down quickly to four cups. Taste. Most broth is on the weak side, so if reducing didn’t increase the flavor enough you can boost it with some bouillon (such as Better than Bouillon). Sometimes I use a splash of sherry or tamari.

Add the garlic, ginger, and carrots. Simmer for another five minutes. While the soup is simmering, divide the noodles between two bowls and put a spoonful of garlic-chili paste in the middle.

Add the carrots and simmer five minutes.

If you’re using raw minced meat, add it now and simmer five minutes. If you’re using cooked meat or tofu, add it now and simmer two minutes.

Add your ribbons of swiss chard, simmer another two minutes.

Spoon the vegetables and protein over the noodles in the bowls, then divide the broth between them.

Slice the eggs in half and nestle them on top. Serve with fresh cilantro and additional garlic-chili paste on the side.


Dulce de Leche Truffle Pie

by Heather Harris Brady

My quest for desserts that retain their true caramel nature, and my broken oven, led me to this pie.  I’m pretty proud of it because it’s quick, easy and most of all you get lots of delicious dulce flavor in every bite. It would make a terrific surprise for Thanksgiving dinner, either as a hostess gift or just as a companion to the more traditional pie selection.

Dulce de Leche Truffle Pie, Makes one 9″ pie

  • One shortbread or crumb crust (chocolate crumb would be good as well)
  • 1 3 oz box instant vanilla pudding mix
  • 1 c. milk
  • 1 c. heavy whipping cream
  • 1 13-oz can dulce de leche
  • Chocolate ganache for garnish, if desired

Combine the pudding mix and milk in a mixing bowl. Beat for one minute,  until well-mixed.

Add the cream and turn the mixer to high.

Whip until the mixture starts to set, and you see streaks left from the beaters. Continue whipping, and spoon the dulce in.

Stop to scrape down the bowl, and finish whipping until it’s well-combined. Pour the mixture into the pie shell.

Drizzle the top with chocolate ganache or chocolate shavings.

Refrigerate for at least two hours. Slice and serve.

Store any leftovers in the refrigerator, lightly covered. This pie should keep well for at least three days, but ours was gone in a day!


Raspberry Mousse Cakes, Part 2 of 2

by Heather Harris Brady

It’s been quite a run these last few weeks, we had a power outage that killed my oven and a houseful of college students for a long weekend! I have a small countertop convection oven that fits one 13 x 9 pan, so I had to use it for all of my baking. Repairs are scheduled for next Friday so hopefully after that I’ll be back in business.

So we ‘re on to the finish step for these mousse cakes, the chocolate mousse and ganache coating.

Raspberry Mousse Cakes, Makes four servings

Chocolate Mousse

  • 1 pint heavy whipping cream
  • 1 c. high-quality chocolate chips (I use Ghirardelli 60%)
  • 2 T. water
  • 1 T. sugar

Bring the water and sugar to a boil over medium heat, and stir until the sugar is dissolved. Whisk in the chips and stir until smooth. Set aside to cool to room temperature.

When the chocolate is cool, whip the cream to stiff peaks.

Fold in the chocolate, and keep folding until there are no white streaks left.

Put your mousse in the refrigerator to set up, about one hour.

Unmold your frozen cakes from the ramekins.

Cover each one with a coating of mousse. Get it as smooth as you can if you want a smooth finish.

Pop them back in the freezer while you make the ganache.

Chocolate Ganache

  • 1 pint heavy whipping cream
  • 1 c. high-quality chocolate chips (I used the Ghirardelli 60% again, but a dark chocolate bar with a raspberry flavor would be nice here.)
  • 1 T. butter
  • 1 t. vanilla

To save room I’ve skipped the step by step here. Put the cream in a saucepan over medium heat. When it starts to steam whisk in the chocolate chips and stir until melted. Take it off the heat and whisk in the butter and vanilla. Let it cool until it’s spreadable.

Bring your cakes back out of the freezer.

Frost each one with a final coat of ganache. It will harden quite quickly on the frozen cake. You can serve these right away, or put them in the refrigerator until you need them.

I garnished these with white chocolate shavings, mint and fresh raspberries.

Raspberry Mousse Cakes, Part 1 of 2

by Heather Harris Brady

The Story of Two Glazes

It was the best of times and it was the worst of times. I had a day off, nothing schedule, and time to go deep down the Pinterest rabbit hole.  Time, in fact, to fall in love with mirror glazes and time to put the plan into action. I carried it through and achieved peak shine:

But after all the work it flat-out just didn’t taste good, which is goes against the cooking motto I was raised with: “at least it’ll taste good”. This is something we said in my family whenever anything didn’t turn out looking like we expected. So I went back to the basics, and came up with something that tastes incredible.

This is a multi-part recipe. You could do it all in a day, if you’re at a loose end, or you can do one part each day and end up with a stunning dessert for a nice dinner on the weekend. It’s up to you. This is a recipe for four, but it easily doubles.

Raspberry Mousse Cake, Makes four individual servings

  • One 8″ square white butter cake, homemade or purchased
  • One recipe raspberry mousse
  • One recipe, chocolate mousse
  • One recipe, chocolate ganache

Part One: The raspberry mousse and first assembly

  • 1 c. fresh or frozen raspberries (if using fresh crush half and recombine)
  • 1/4 c. granulated sugar
  • 1/2 c. boiling water
  • 1/4 c. cold water
  • 2 t. unflavored gelatin
  • 1 pint heavy whipping cream
  • 1 T. granulated sugar
  • 1 t. vanilla

Soften the gelatin in the cold water, pour in the hot water and stir until it’s dissolved. Stir in the raspberries.

Put your raspberry gelatin in the fridge. When it starts getting sludgy (beginning to thicken) start on the whipping cream. Pour the cream into a mixing bowl and begin to whip. When it starts to thicken add the sugar and vanilla gradually. Whip until soft peaks form.

Fold in the raspberry gelatin.

Cover with plastic wrap and return the mousse to the refrigerator to set (about an hour).
Assemble four ramekins. Cut four circles of cake to fit the ramekins. Take those circles and cut them in half horizontally, so you have eight thin disks of cake. Put a disk in the bottom of each ramekin.

Add a layer of mousse nearly to the top of each ramekin.

Top with the second cake layer.

Cover each with plastic wrap and freeze until firm. In our next step we will be unmolding and finishing this dessert by covering them with chocolate mousse and an outer layer of ganache.